Tag Archives: DIY

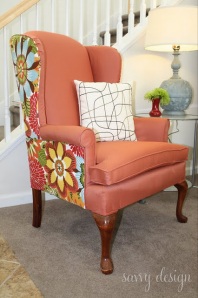
Reviving the Wingback

I have always loved wingback lounges.  There is something about the beautiful curves and lines that never fail to make me smile.  Of course quality wingback suites are generally on the more expensive side and I had resigned myself to waiting a good few years before affording a set.

But where there is a will there is a way.  During an afternoon of daydreaming over wingback suites on the net, I came across tutorials for reupholstering pre-loved (note: cheaper!) wingback suites.

Savvy Designs

Image from Savvy Designs

Modest Maven

Image from Modest Maven

That was all I needed to spur me onto eBay and Gumtree, searching my little heart out.  And then I got lucky.  A lovely 2-piece suite on eBay for just $150.00.  I saw, I bid, I won.

Wingback Suite

These beauties were leaving their home as the seller explained his mother had purchased them in England in 1952 but was moving into assisted living also assuring us that the lounges had been steam cleaned and well loved.  We promised we would give them as much love as she had.

Watch this space to see the refurbished lovelies.

Unmentionables

The next big project is our laundry area.  The layout of our {town}house places our laundry in the downstairs powder room.  This means that our guest have the pleasure of viewing our washer, dryer and unmentionables being cleaned when they visit the powder room.

Laundry / Powder Room

A visit to Pinterest provided lots of inspiration to remedy the problem:

Image from blogs.babble.com

Image from House of Turquoise

Image from nicespace.me
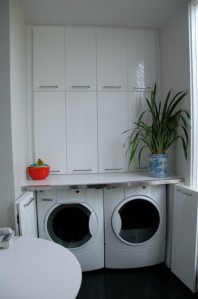
Image from Dwell

Image from Design Sponge

Finding the Design Sponge picture was a plus, as I was pleasantly surprised to see how others deal with the issue of a laundry in the power room.  Unfortunately, ours isn’t as straight forward, as the room layout is awkward, with a corner protruding to cover a vent in one corner.

Corner Vent

Our washer is on the left and a set of storage drawers sits on top of the dryer.  After seeing all of the different ways others have “hidden” their laundry, I made up a sketch to do the same for ours.
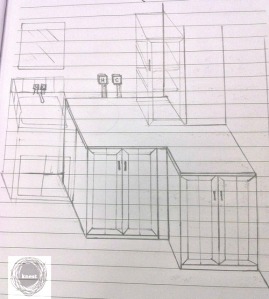
Laundry Cupboards

Laundry Cupboards

As you can see, a mirror above the sink is in order, as well as built in storage and a counter space. I’ve designed bi-fold door to save space as the room itself is not very large. Fingers crossed our laundry will transform to a bona fide powder room.

After measuring and re-measuring, I made up a plan and took a trip down to the local Bunnings and spoke to their ‘cabinet expert’.  Terry was quite knowledgable and actually recommended we use the services of wholesale supplier to have the melamine cut millimeter perfect.  His honesty, instead of trying to convince me to pay for them to do it has meant I will purchase all my other supplies from Bunnings. Honesty is always the best policy after all.

Terry directed me to Dennis at Janden Wood Products.  Dennis was lovely, and worked directly off the plan I faxed through:
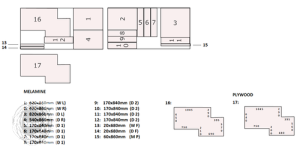
Plans

I worked off two standard 2400x1200mm cuts and a plywood piece for under the counter-top. The materials alone retail for $85.00, so I was very happy to receive an invoice of only $100 for all materials and labor!

Once I actually get around to assembling the cabinet I promise pictures will be posted!

Wall-to-Wall

We have made our way through a few chipboard-cheapo desks in our time, with each one parting within a year or so.  Unfortunately it is becoming exceedingly difficult to find a good quality desk that doesn’t look like it should be in a library or cost the earth.  Luckily in my late night web search turned up this fabulous DIY creation from Young House Love.

Image from Young House Love

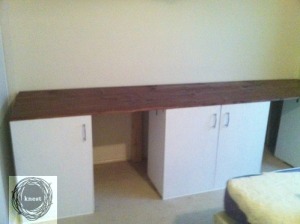
After a short search on eBay, we came across four kitchen cabinets for $35! The original DIY called for bedside cabinets so ours had to be cut down by 15cms and then put back together.  The cabinets were set in the same order as above, one on each side and two in the middle.

To make the counter we purchased three planks 3 meters of 2 by 10 at Bunnings. The lovely guys in the timber section cut each plank into 3 different lengths which created a nice overlapping pattern. We then sanded and stained each plank, braced them together and screwed the three large planks to the cabinets.

1

Final touches of L-brackets to support the back of the counter and our desk was finished.

Here is the Guest Room / Study circa 2008 and 2011: